HOW TO Install PLASTIC BUNK COVERS
HOW TO InsTALL BUNK COVERS
HOW TO INSTALL PLASTIC BUNK COVERS
- READ ALL INSTRUCTIONS CAREFULLY PRIOR TO INSTALLATION These instructions are from the manufacturer NOT Outcast Watersports (Boat Trailer Parts Place)
- TOOLS REQUIRED: Power Drill with #2 Phillips Bit, Pencil, Sharp Utility Knife, Tape Measure.
- NOTE: If you are concerned about Scratching your Gel Coat Hull, DO NOT USE THIS PRODUCT.
- TIP: If you are using product for trailer and have a Gel Coat Hull, keep Bunk Wrap and hull clean of surface derbies to eliminate scratching.
- NOTE: Apply to Solid wood only. If bunk boards are rotten, screws will not hold Bunkwrap in position.
Step 1: “Optional” Remove carpet. Bunkwrap will conform to bunk board with and without carpet.
Step 2: “Optional” Remove bunks. Mark brackets that attach trailer to bunk boards (cut with knife) to ensure correct replacement. Remove bunk boards from trailer brackets (easier to install)
Step 3: Unroll Bunk Wrap and place bunk boards on top of bunk wrap. Measure bunk boards or mark Bunk Wrap and cut 1/16” shorter than bunk board length. To cut: score with a new blade and speed square. Bend 90 degrees for a clean break. Remove any sharp edges from brake if needed.
Step 4: Place end caps on ends of bunk boards and put 2 flathead fasteners on sides where wrap will hide fasteners. Screw in top fastener first to make sure end cap lays flat on bunk surface.
Step 5: Centerboard on inside of wrap upside down (if bunk board is removed from trailer or lift) Fold bunk wrap around bunk and end caps while checking length center alignment. Screw and snitch in middle 2 fastening points (or closest slot)
TIGHTEN MIDDLE 2 ONLY
Step 6: Continue adding fasteners in all slots (every 12”) but leave a small 1/16” gap between fastening head and material “DO NOT TIGHTEN” this will allow material to expand and contract with different temperatures eliminating any ripples or bowing in your bunk wrap.
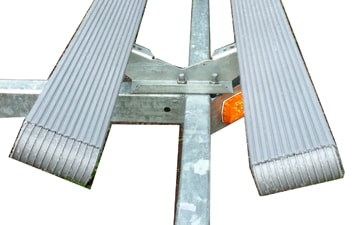
Step 7: Reattach bunk boards on Trailer Bracket mounts. Trim away any interfering material so bracket sits directly on wood. If existing holes are stripped move slightly and relocate for secure fastening.
WARNING: These products are only designed to reduce resistance created when loading/unloading watercraft. Surfaces are slippery, especially when wet. Extreme caution should be taken when walking or climbing on any trailer in which any Caliber products are installed.
CALIBER, INC. LIMITED LIFETIME WARRANTY Caliber, Inc. warrants that this product will be free from defects in material or workmanship under normal use, installation and service. Caliber, Inc. reserves the right, before having any obligation under this limited warranty, to inspect the damaged Caliber product. All warranty shipping costs for inspection shall be borne solely by the purchaser. This limited warranty is non-transferable. Contact Caliber, Inc. at www.caliberproductsinc.com or at 952-985-9999 for warranty service procedures.
DISCLAIMER : Caliber, Inc. shall not be liable for any special, incidental or consequential damages, including, but not limited to, lost revenues, lost profits, personal injury, damage to property, and third-party claims, arising out of any warranty, contract, statutory or tort. Notwithstanding the term of any limited warranty or any warranty implied by law, or in the event that any limited warranty fails of its essential purpose, in no event will Caliber’s entire liability exceed the purchase price of this product.
CALIBER® 952-985-9999 www.caliberproductsinc.com